How to Use a Coldcard Air-Gapped Bitcoin Wallet
In this beginner-friendly tutorial, I'll walk you through how to use the Coldcard Mk4 with Sparrow Wallet in an air-gapped manner. By the end of this guide, you'll have the confidence and knowledge to use your Coldcard effectively and securely.
Before we jump into the how-to sections, we'll go over some important concepts that you should know as you embark on your bitcoin self custody journey.
Things you will need
Here’s what you’ll need to follow along with this guide. Some of these links are affiliate links, and by using them, you’ll be supporting me on my mission. As an Amazon Associate, I earn from qualifying purchases, and your support is greatly appreciated!
| Category | Why You Need It | Link |
|---|---|---|
| Coldcard Wallet | My favorite hardware wallet and what we will use in this video. This will keep your bitcoin private keys secure. | COLDCARD Mk4 |
| Sparrow Wallet | A popular open-source bitcoin client. This is needed to view our wallet and create transactions. | Sparrow Wallet |
| Power Only USB-C Cable | A usb-c cable for powering your Coldcard. This cable had it's data wires removed to help improve security. This is what I use. | PortaPow 3.3ft Data Block USB-A to USB-C Cable |
| Micro SD | Required for data transfer between the Coldcard and Sparrow wallet for Air-gapped operation. The coldcard only supports up to 32GB in storage size, so don't get anything bigger than that. | PNY 32GB Elite Class 10 U1 microSDHC |
| (Optional) Micro SD to SD Adapter | You need to make sure your computer can read the Micro SD. This is an adapter that may fit your computer's form factor. | SanDisk MicroSD to SD Memory Card Adapter |
| (Optional) Micro SD to USB Adapter | Another adapter form in case you prefer this over the other adapter forms. | USB3.0 Micro SD Card Reader, 5Gbps 2-in-1 SD Card Reader to USB Adapter |
| (Optional) MacOS USB Adapter | Some macs don't have USB or SanDisk adapter plug-ins, so you need to get a usb-c to usb-a adapter. | LENTION USB C Hub |
Important Bitcoin Concepts
To make sense of everything that's going on with your Coldcard and air-gap, you first need to understand the concept of bitcoin wallets, and bitcoin transactions.
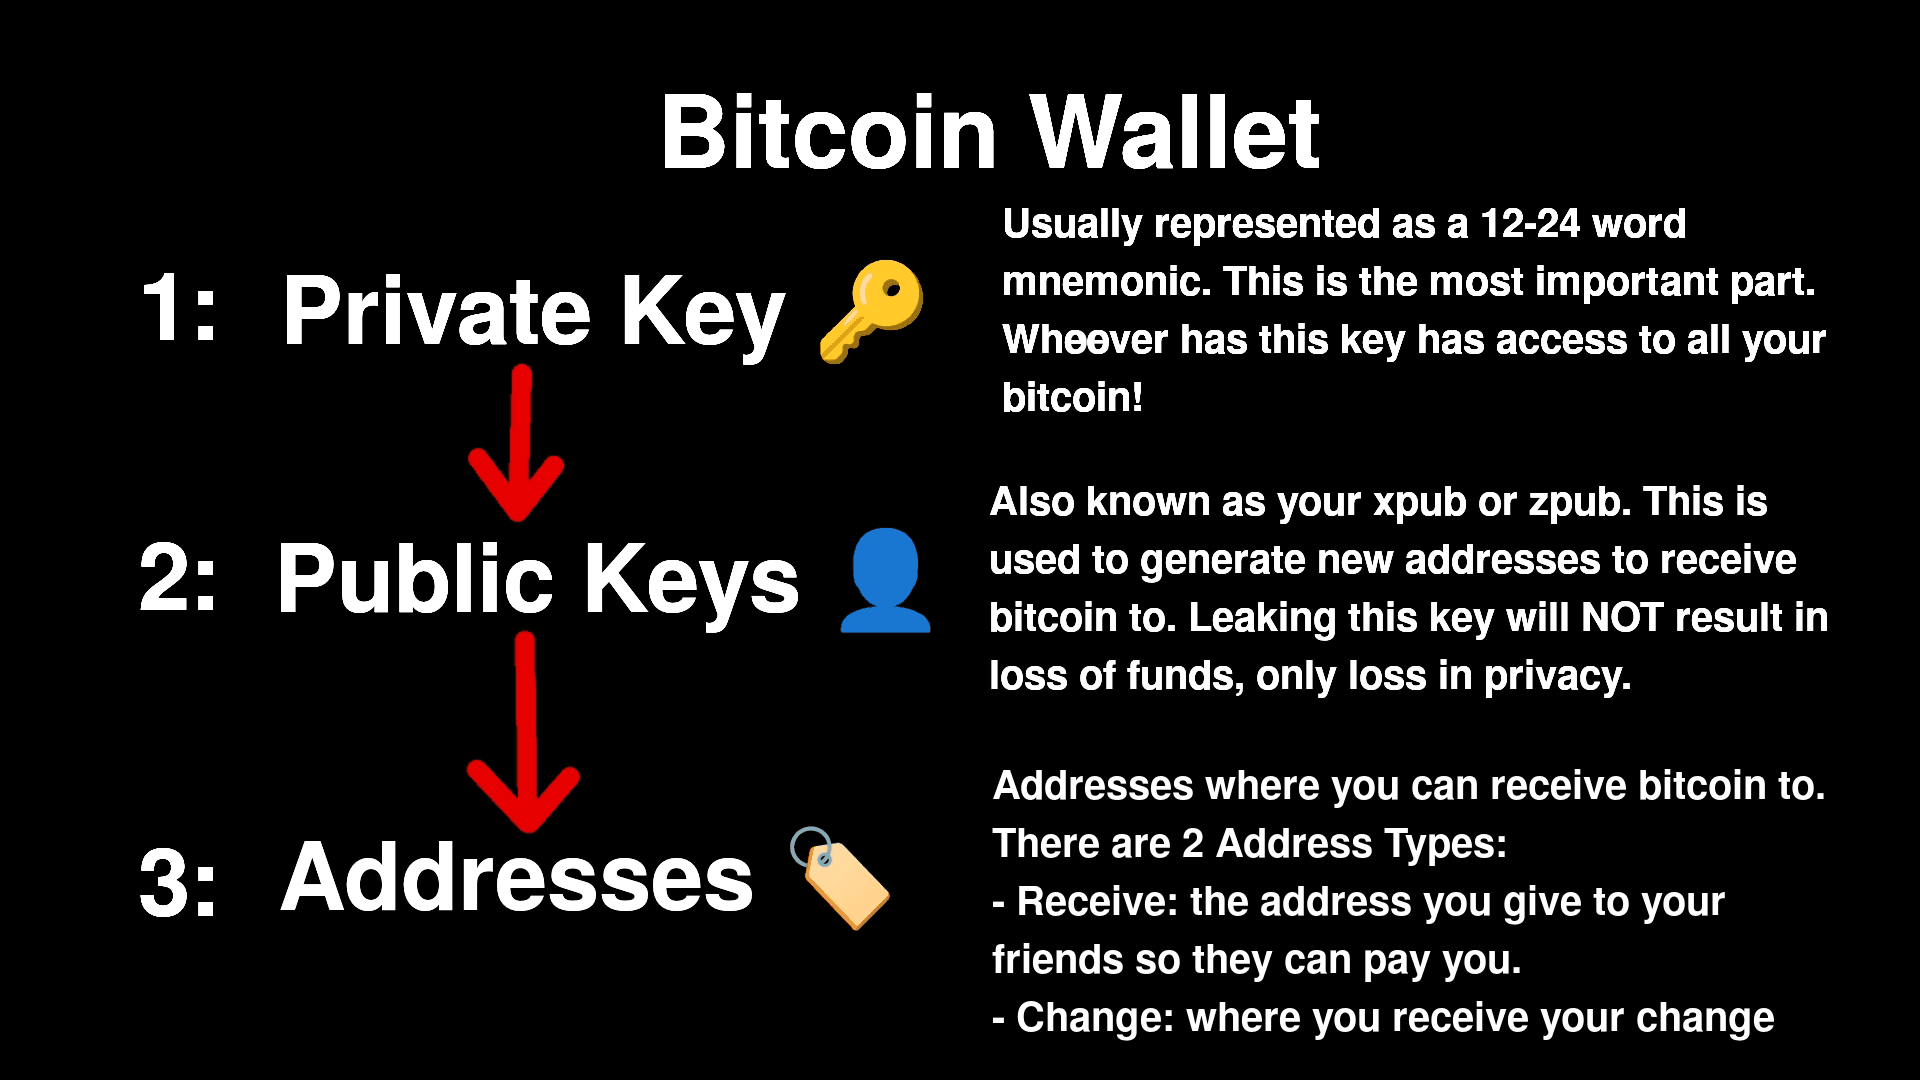
Bitcoin Wallets
The Bitcoin network has no construct of a "wallet." Instead, when we talk about a bitcoin wallet, we are actually referring to a collection of things. Primarily a private key, an extended public key, and addresses.
Bitcoin Transactions
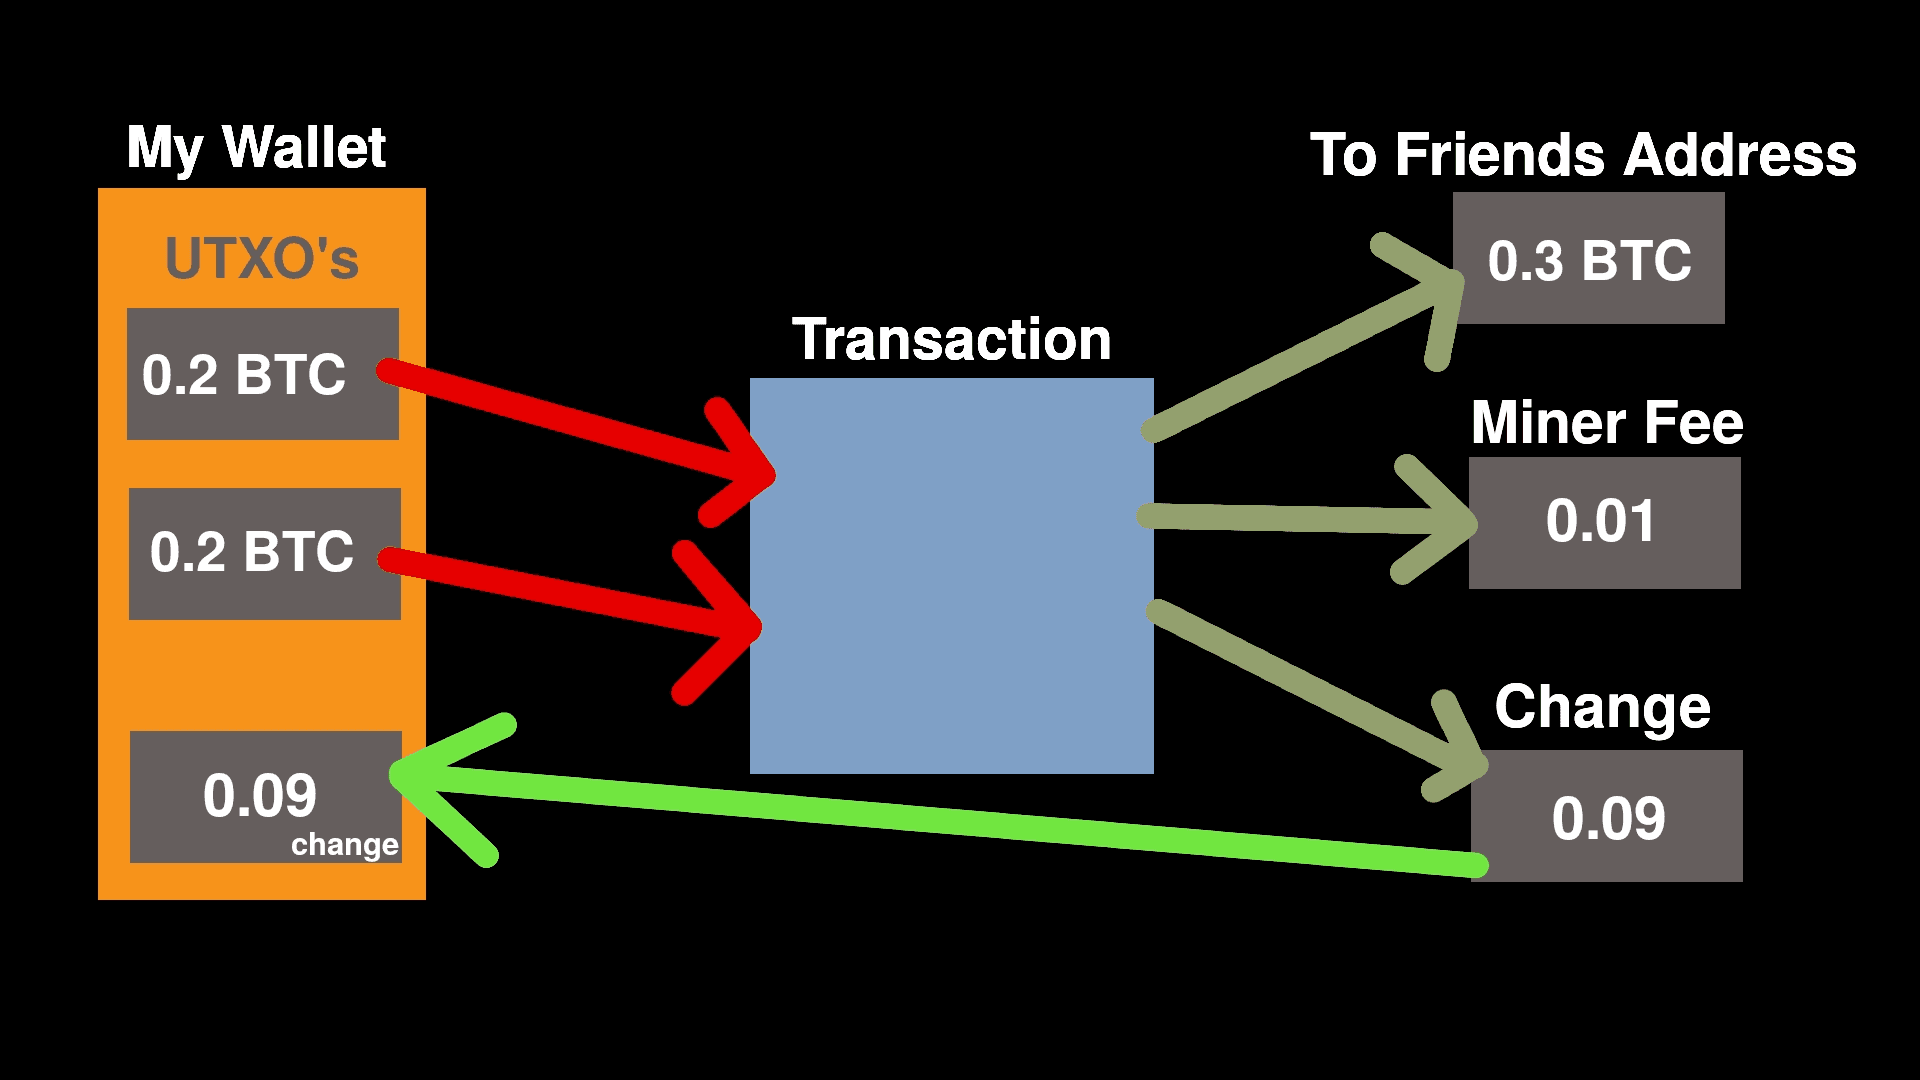
In the image above, suppose we want to send some bitcoin to a friend.
Our wallet has 2 UTXO's in it. UTXO's stand for "unspent transaction output" and are the bitcoin equivalent to having bills in your wallet. In our example, each of our 2 "bills" is worth 0.2 BTC each. To pay our friend 0.3 BTC, we would need to provide both of our UTXO's, to the transaction and receive change back.
This process is nearly identical to how you would pay a friend cash. If you had to pay your friend 15 dollars but you only have a 20 dollar bill, you would expect to get some change back.
The only difference in the bitcoin example and the cash example is that in bitcoin, you have to pay a miner to include your transaction into a bitcoin block (thus making it "final"). Depending on the fee paid, your change amount will change. The fee amount is based on the size of the transaction. A transaction with more inputs and more outputs would make the transaction bigger, and more expensive.
The Air Gap
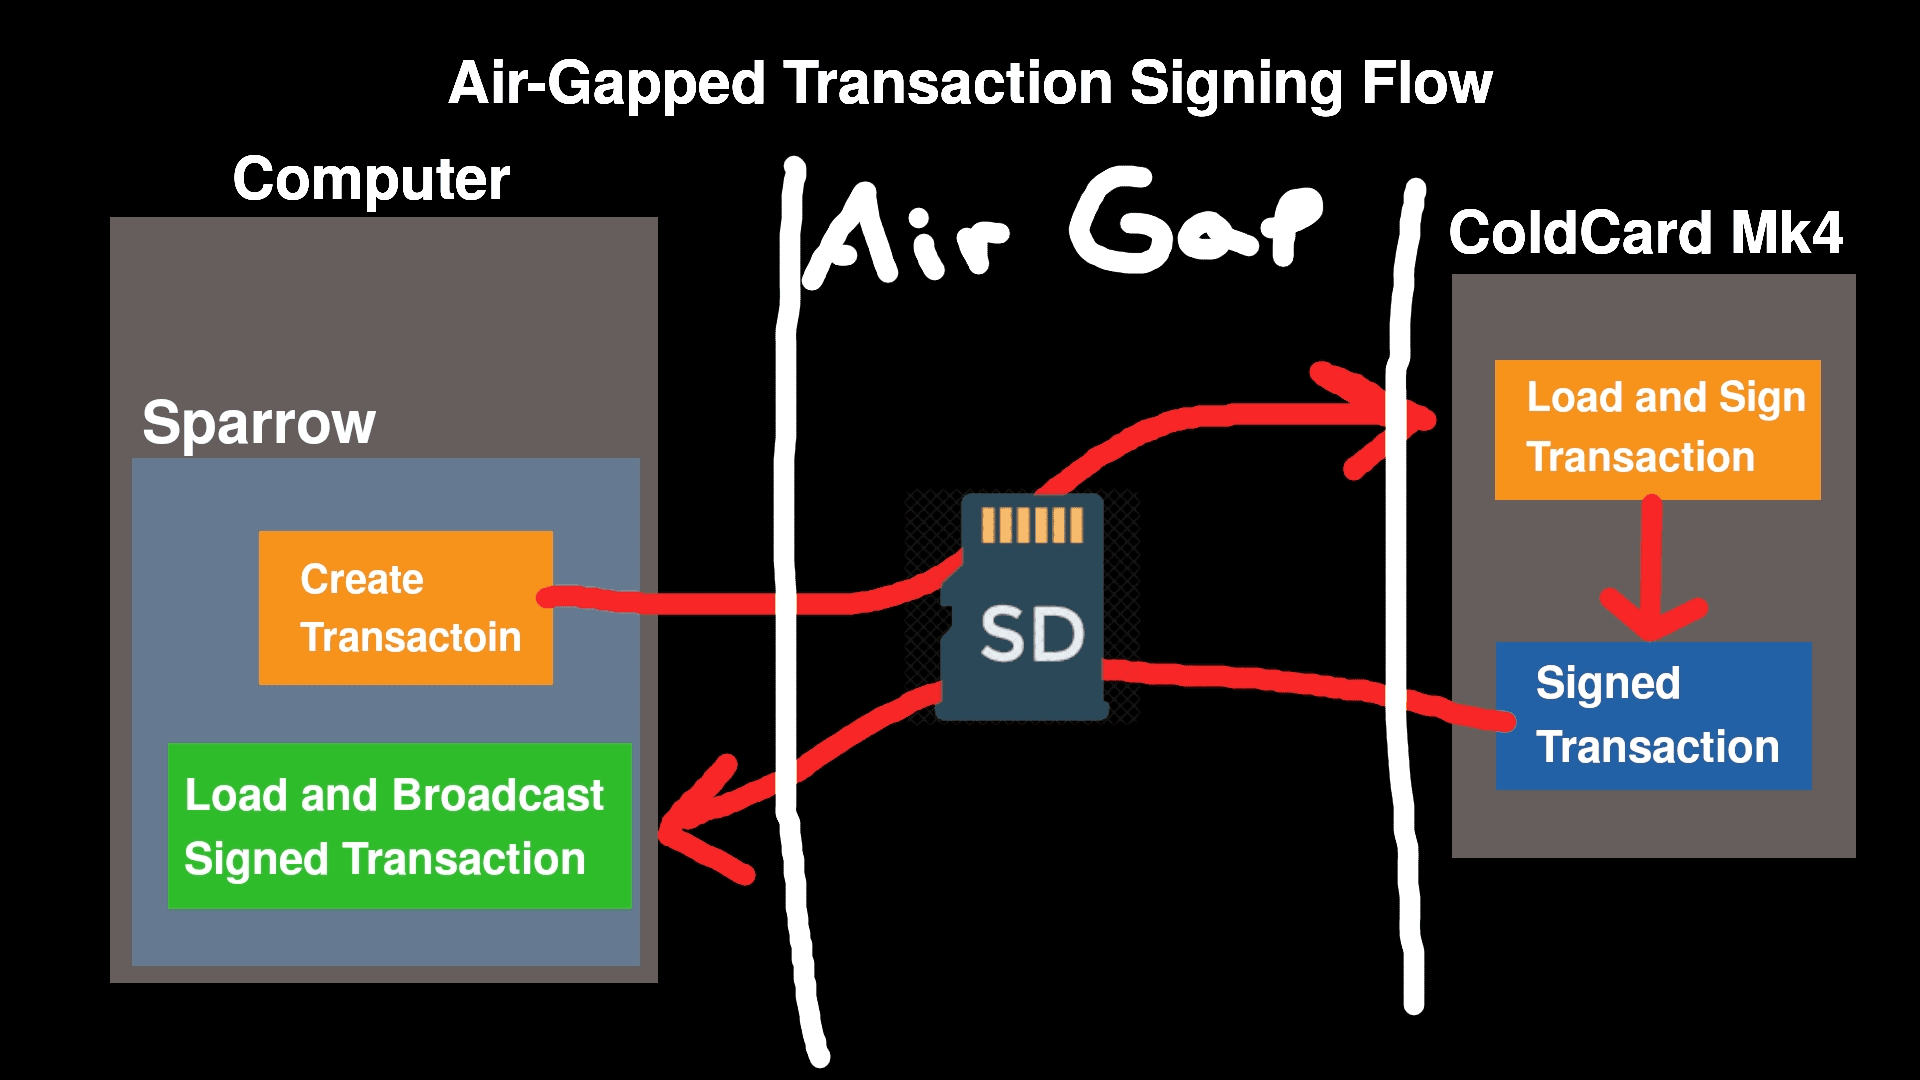
The "air-gap" refers to the method of data transfer between the Coldcard and your computer. Instead of connecting your coldcard directly to your computer through a usb cable, we use a micro SD card. This allows us to keep the 2 components separate, eliminating risk.
Imagine if your computer got infected with some virus that scanned for connected devices for hardware wallets, then attempts cracking said devices. The air-gap eliminates risks like this by making sure only raw data is being passed around manually with a micro SD. This means a direct connection from your wallet to your computer is not only not necessary, but it's also not recommended.
Importing your Coldcard into Sparrow Wallet via Air Gap
Before we get started, your coldcard would need to have already been set up. If your coldcard is still in the original packaging and you have not yet set it up, watch this video from the makers of the Coldcard demonstrating how to perform the initial set up. You only want to watch up until the 2:06 minute mark, as every thing after that is non-airgapped importing. Once your coldcard is set up, continue with the guide below
First, let's get our micro-SD into the computer and delete whatever is on this card. It's good to start from a fresh slate.
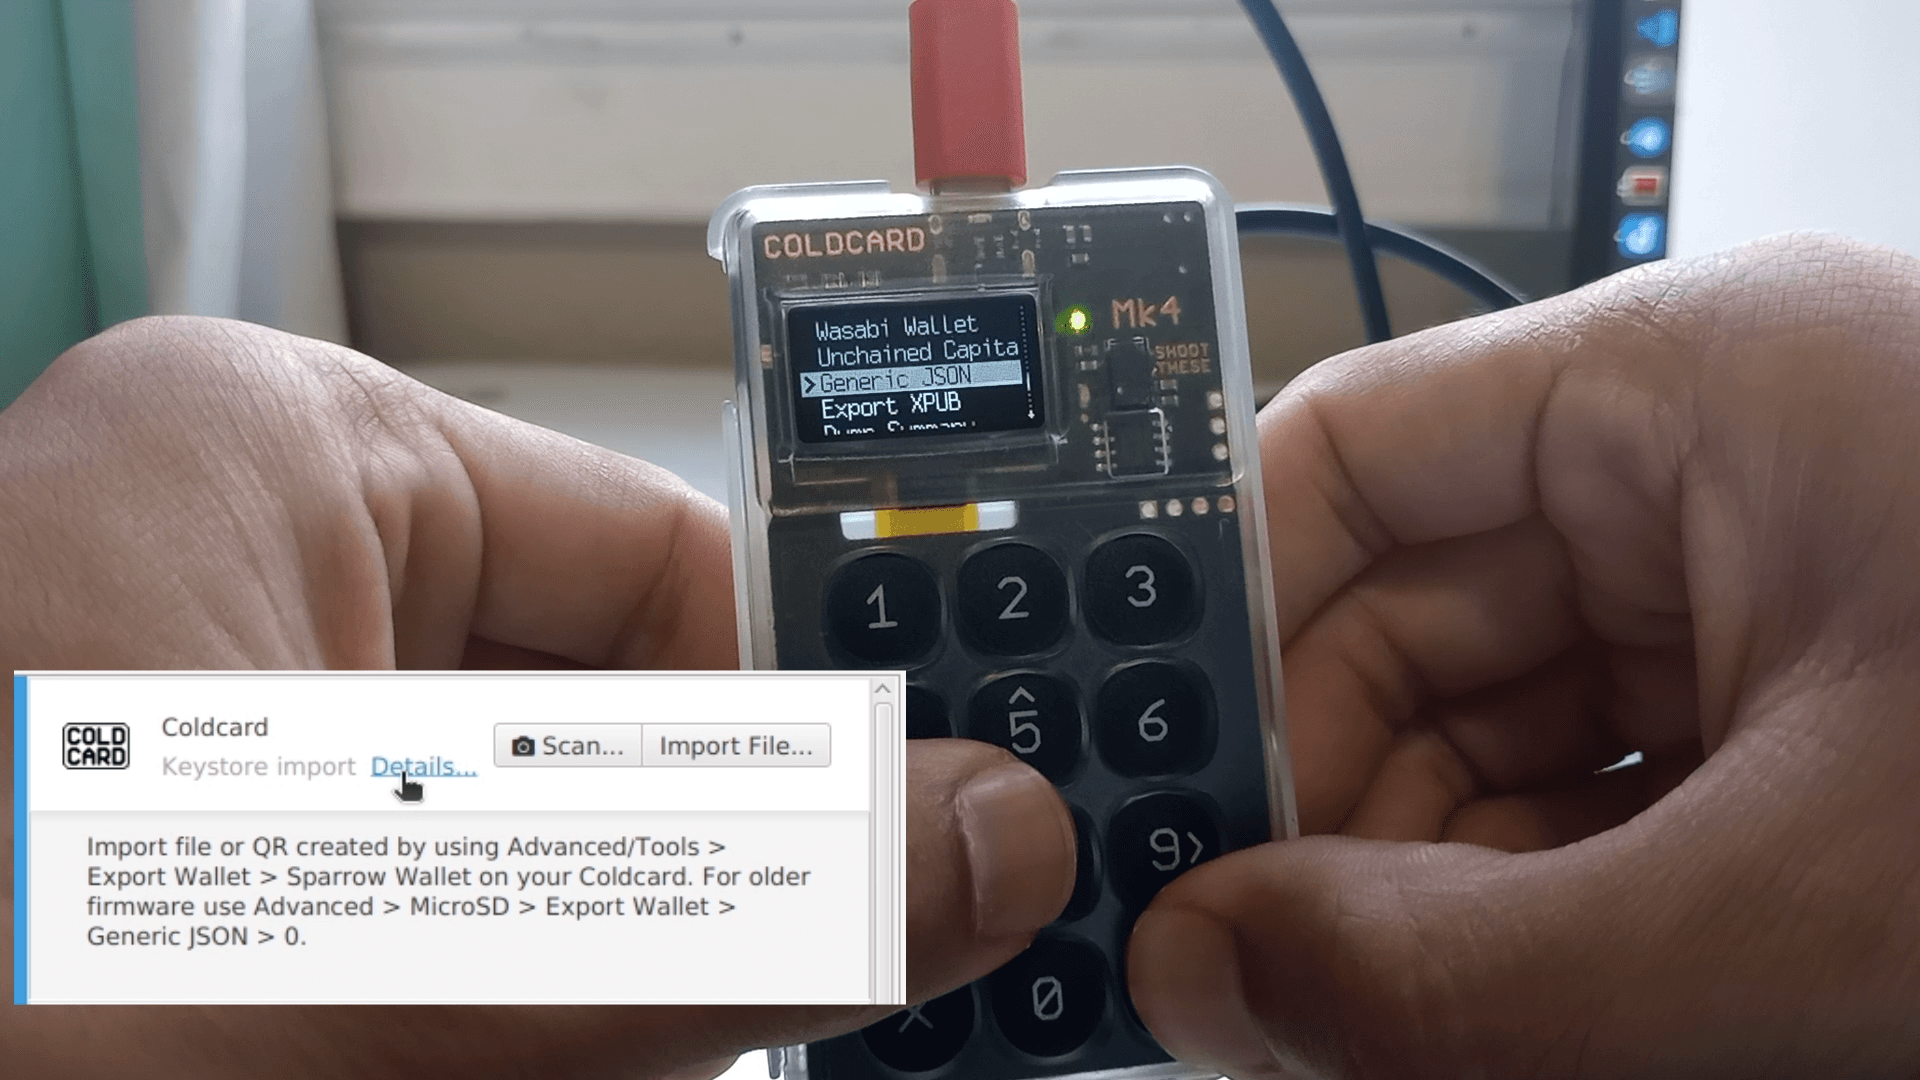
After clearing out this SD card, pop it into the Coldcard and unlock it with your pin. Navigate to the screen as shown in the screenshot and save the export file to the SD Card.
Advanced/tools > Export Wallet > Generic Json > "0"
Your wallet export file should now be saved to your micro sd. Insert your SD card back into your computer.
Create a new wallet on Sparrow by going to File > New Wallet and naming your wallet. You should end up at the screen below.
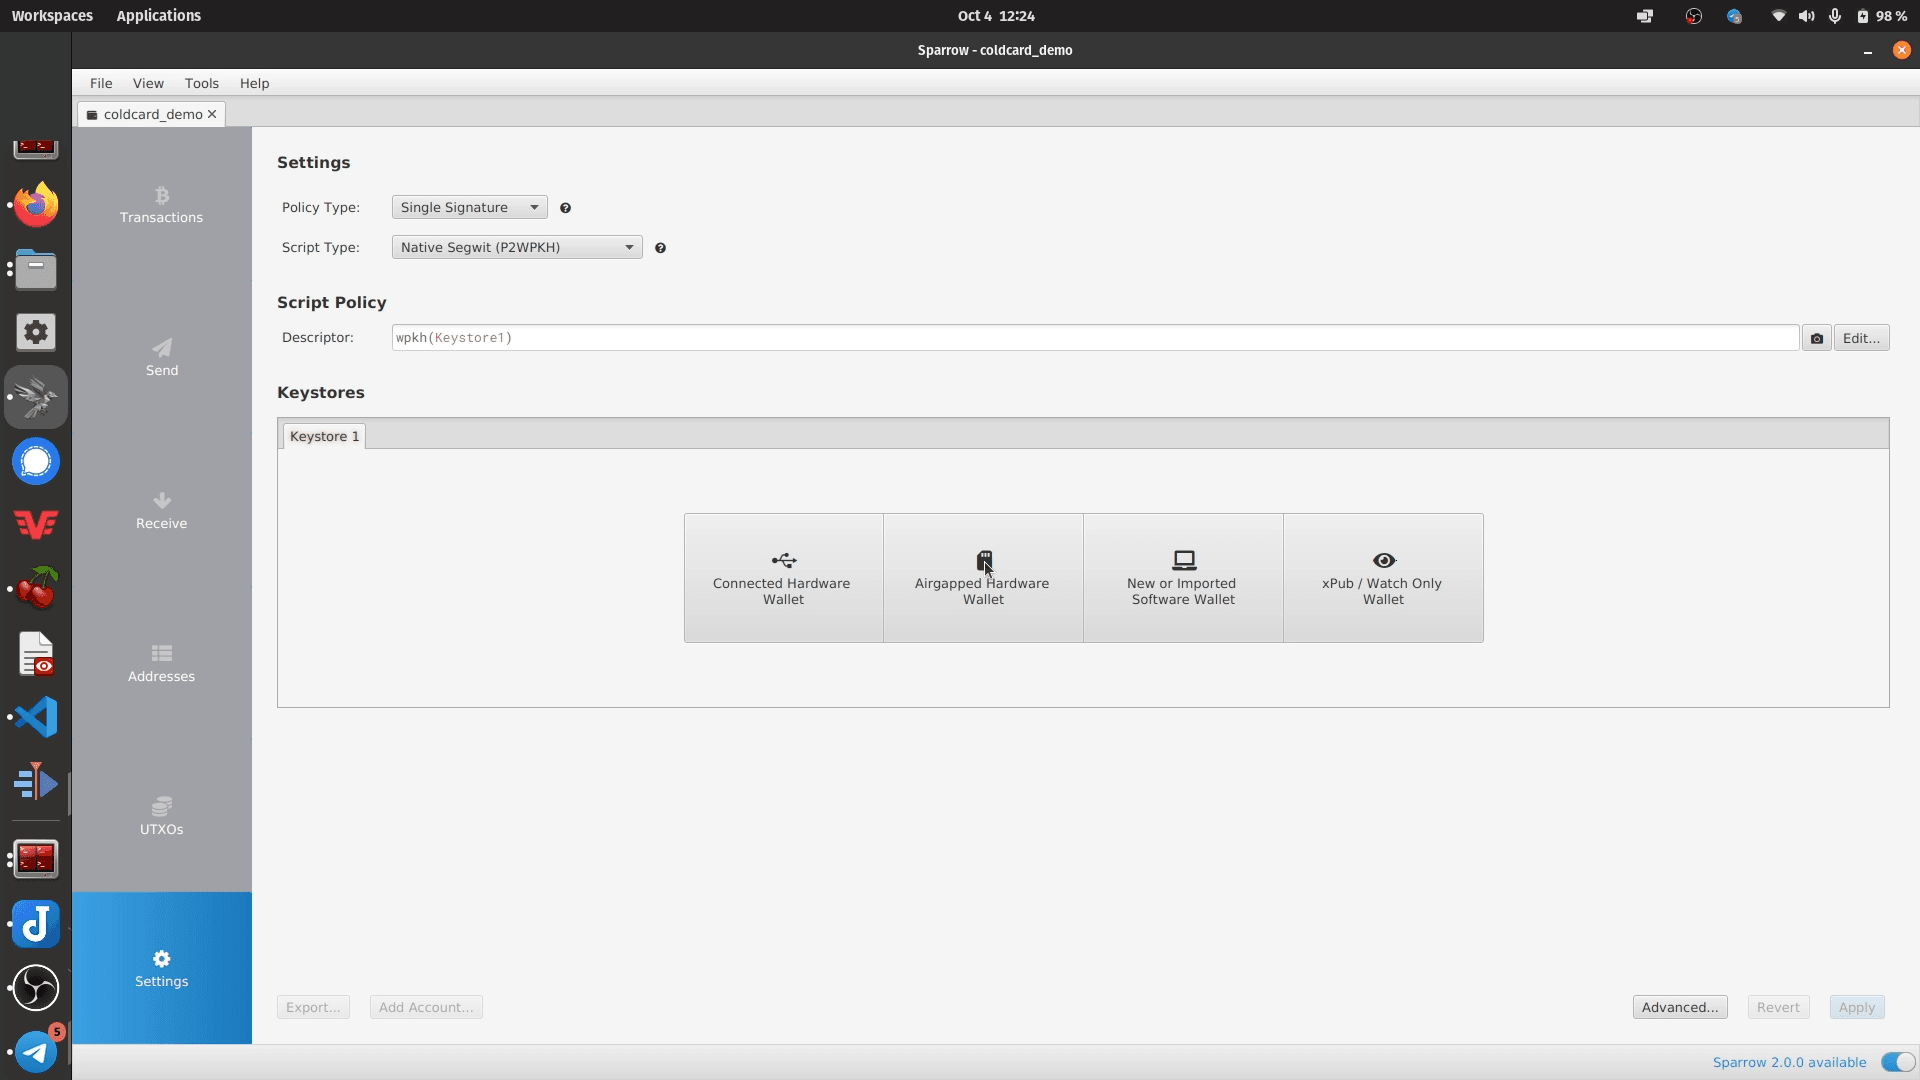
From here, click "Airgapped Hardware Wallet"
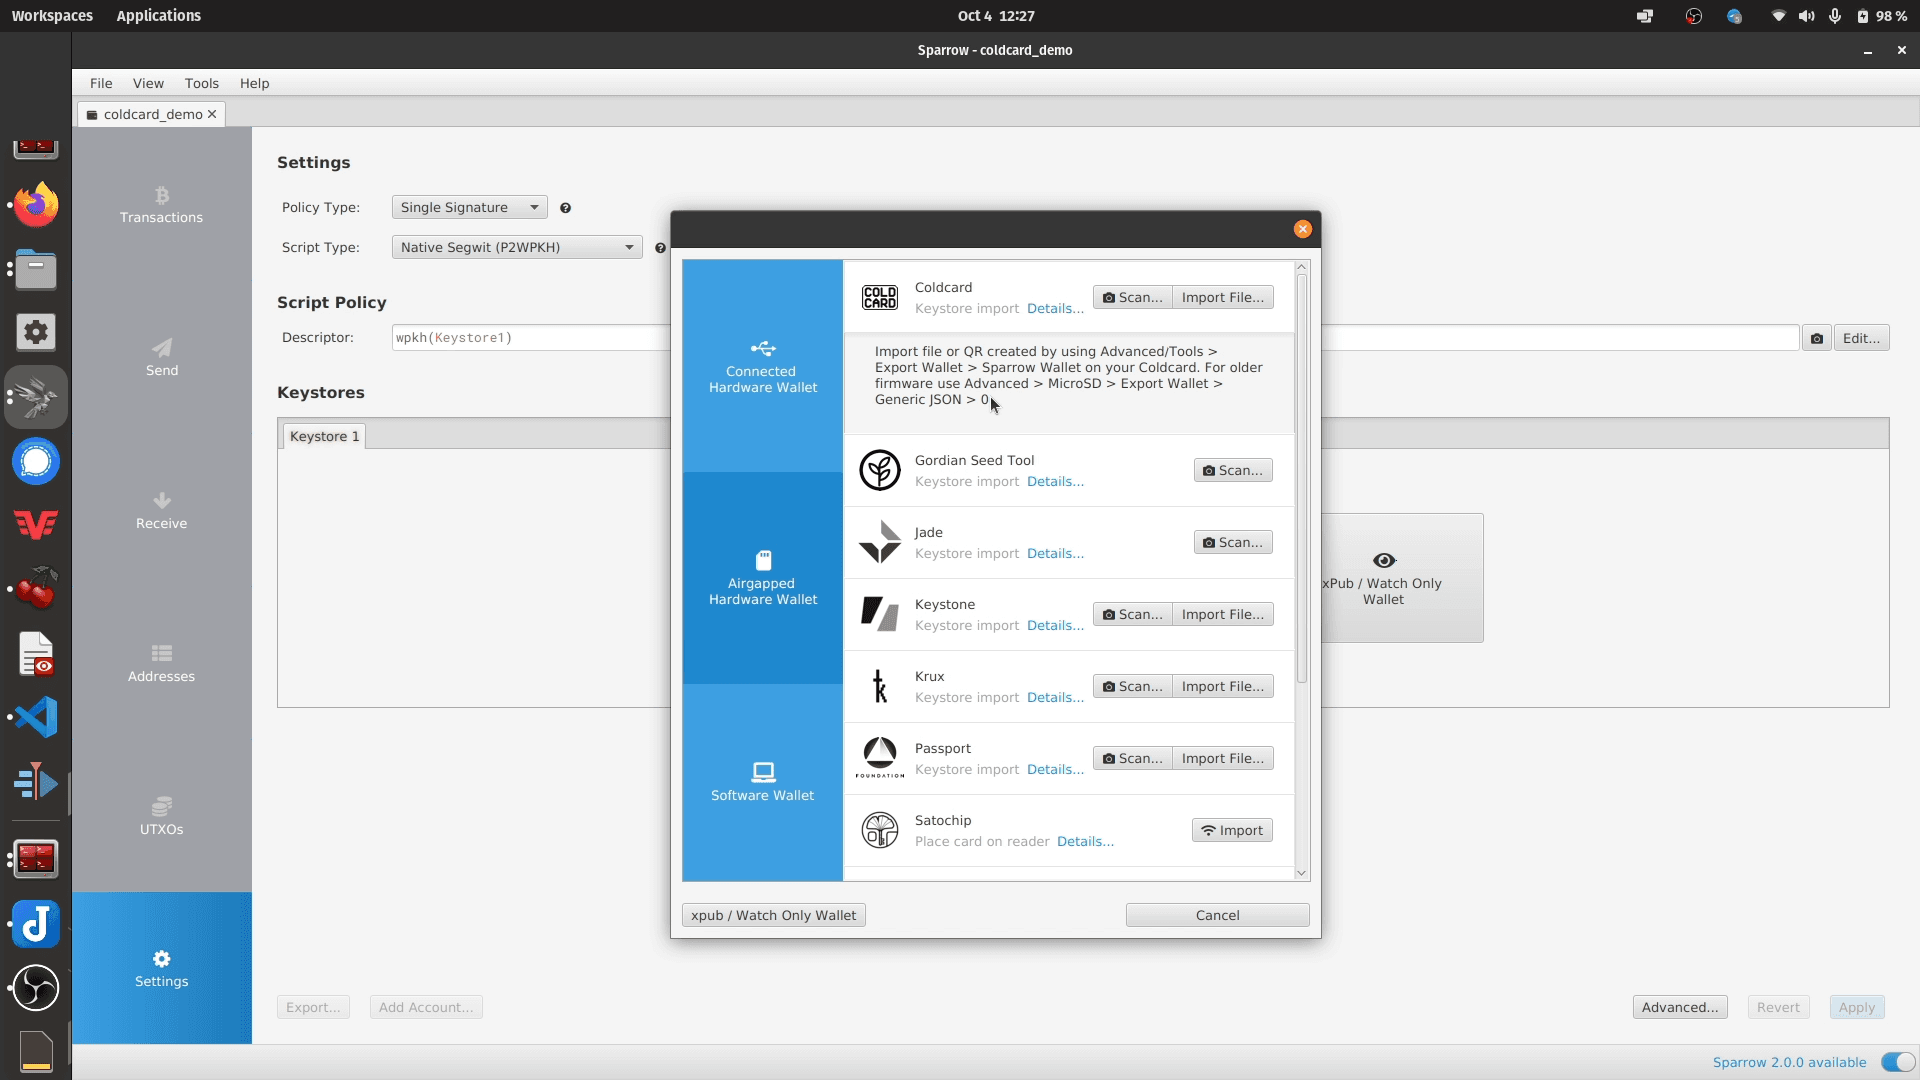
In the import window, click "Import File" next to the Coldcard option, and load the export file that you just created from the micro SD card.
Click "Apply" on the next screen to finalize creating your Coldcard wallet on Sparrow Wallet.
Note: With this wallet export file imported into Sparrow, Sparrow Wallet will be able to keep track of all bitcoin and addresses associated with you wallet. This will allow Sparrow to create transactions on behalf of your Coldcard, but Sparrow alone cannot spend any bitcoin as the private keys do not exist in Sparrow, but only on you Coldcard
Receiving Bitcoin to your Coldcard
Receiving bitcoin to your coldcard is very simple. Once you have you Coldcard opened in Sparrow, you simply click the receive tab and the address that you're given at the top is yours for receiving bitcoin to. This address will change as you receive funds as Sparrow makes sure that each receive address is only used once for privacy reasons.
Remember, you have an infinite number of addresses you can receive bitcoin to in your bitcoin wallet.
You can check out my other post where I show exactly this.
Sending Bitcoin with your Air-Gapped Coldcard
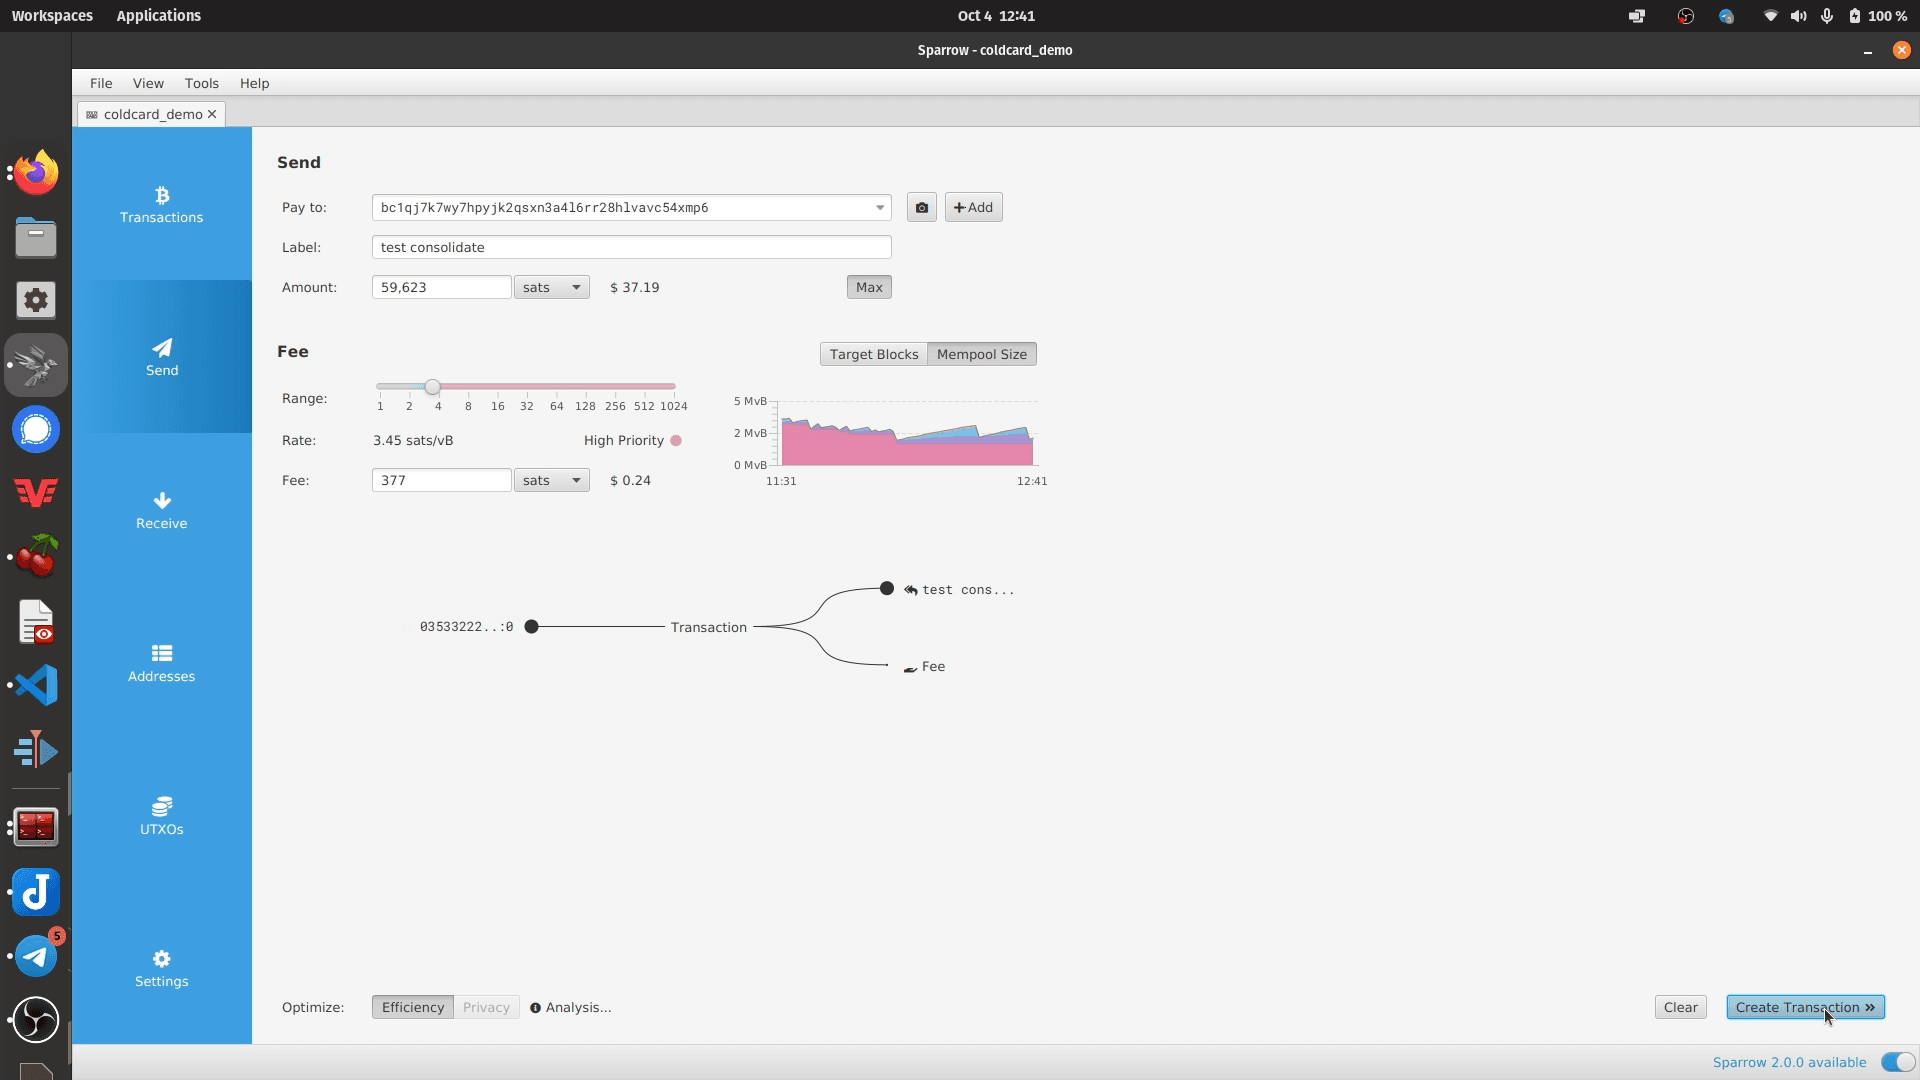
Click the send tab and create the transaction. Here you decide how much to send to whom, and which UTXO's to pay with. You can label your transaction too so you can know what this is when you look back in the future. If you don't know what fee rate to use, you can see what the current fees are on mempool.space.
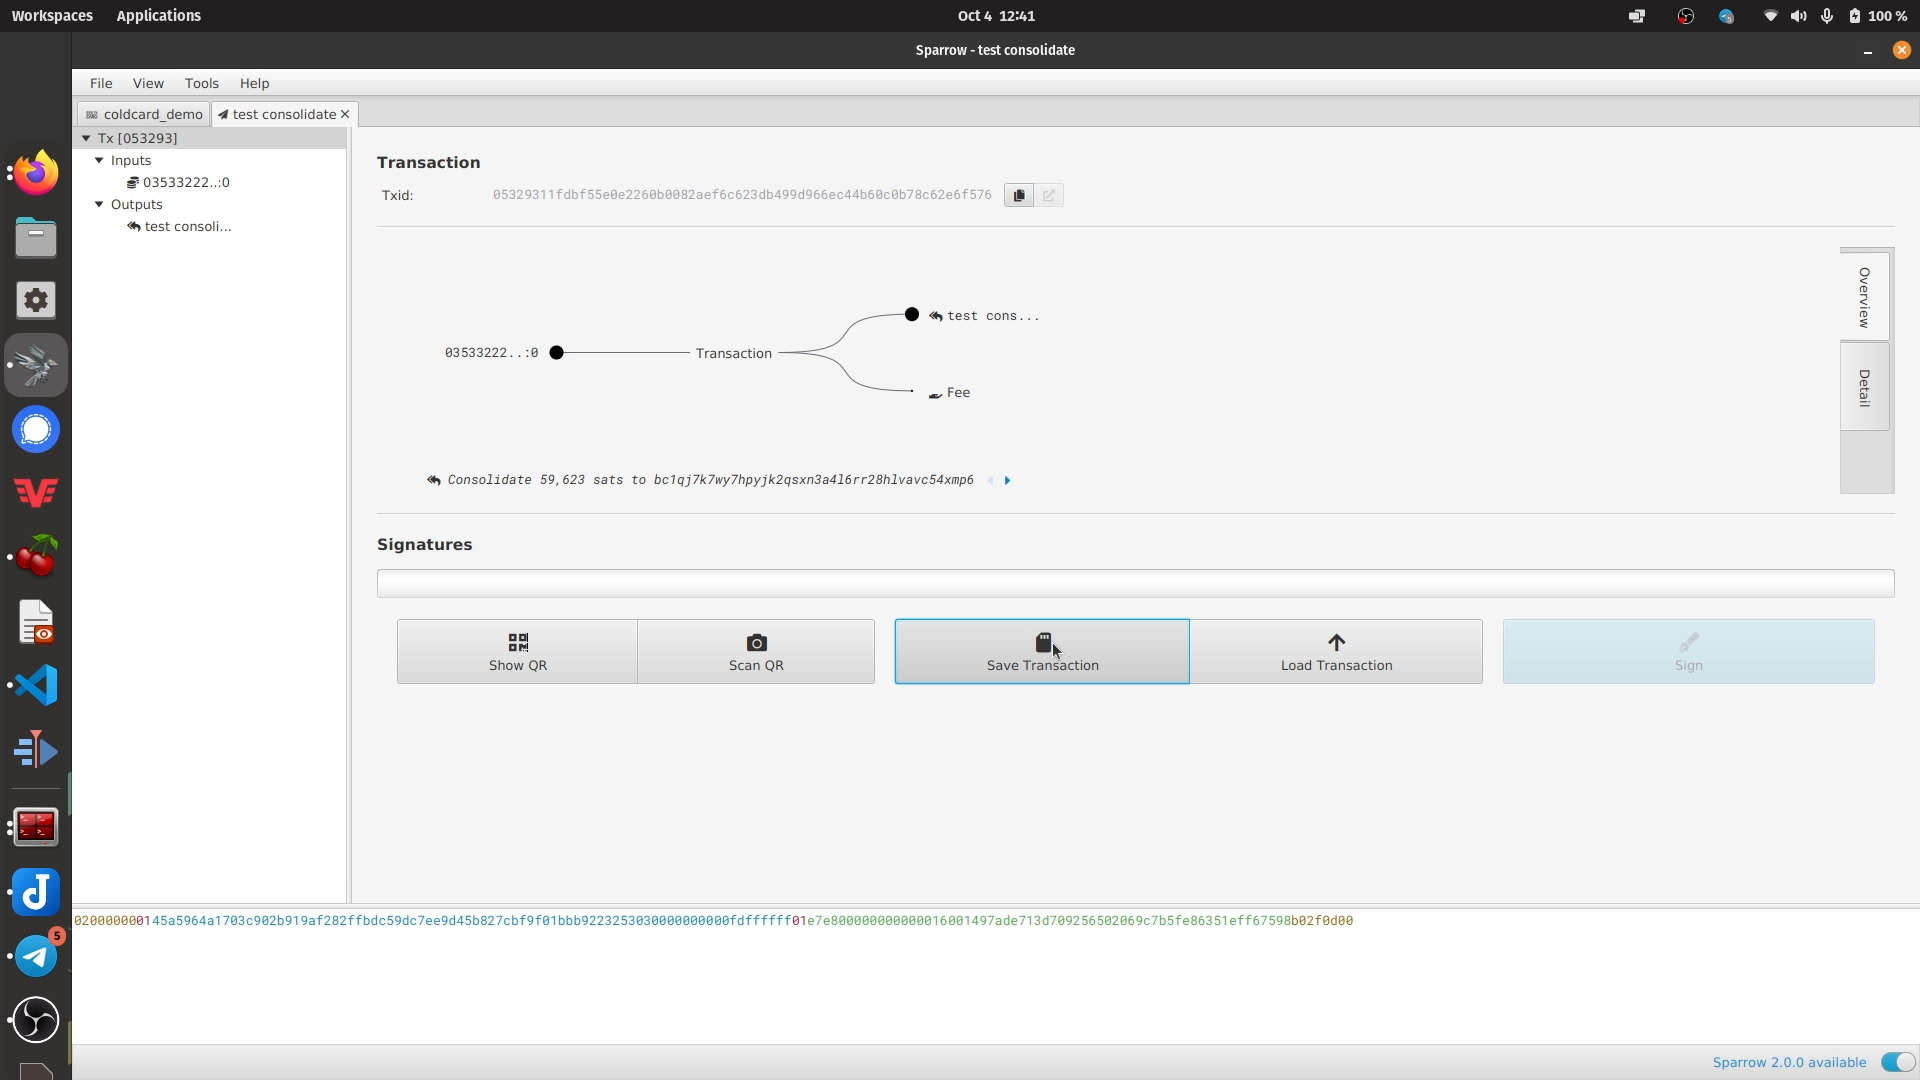
Next, you need to save this transaction to the micro SD card so we can move it to the Coldcard for signing.
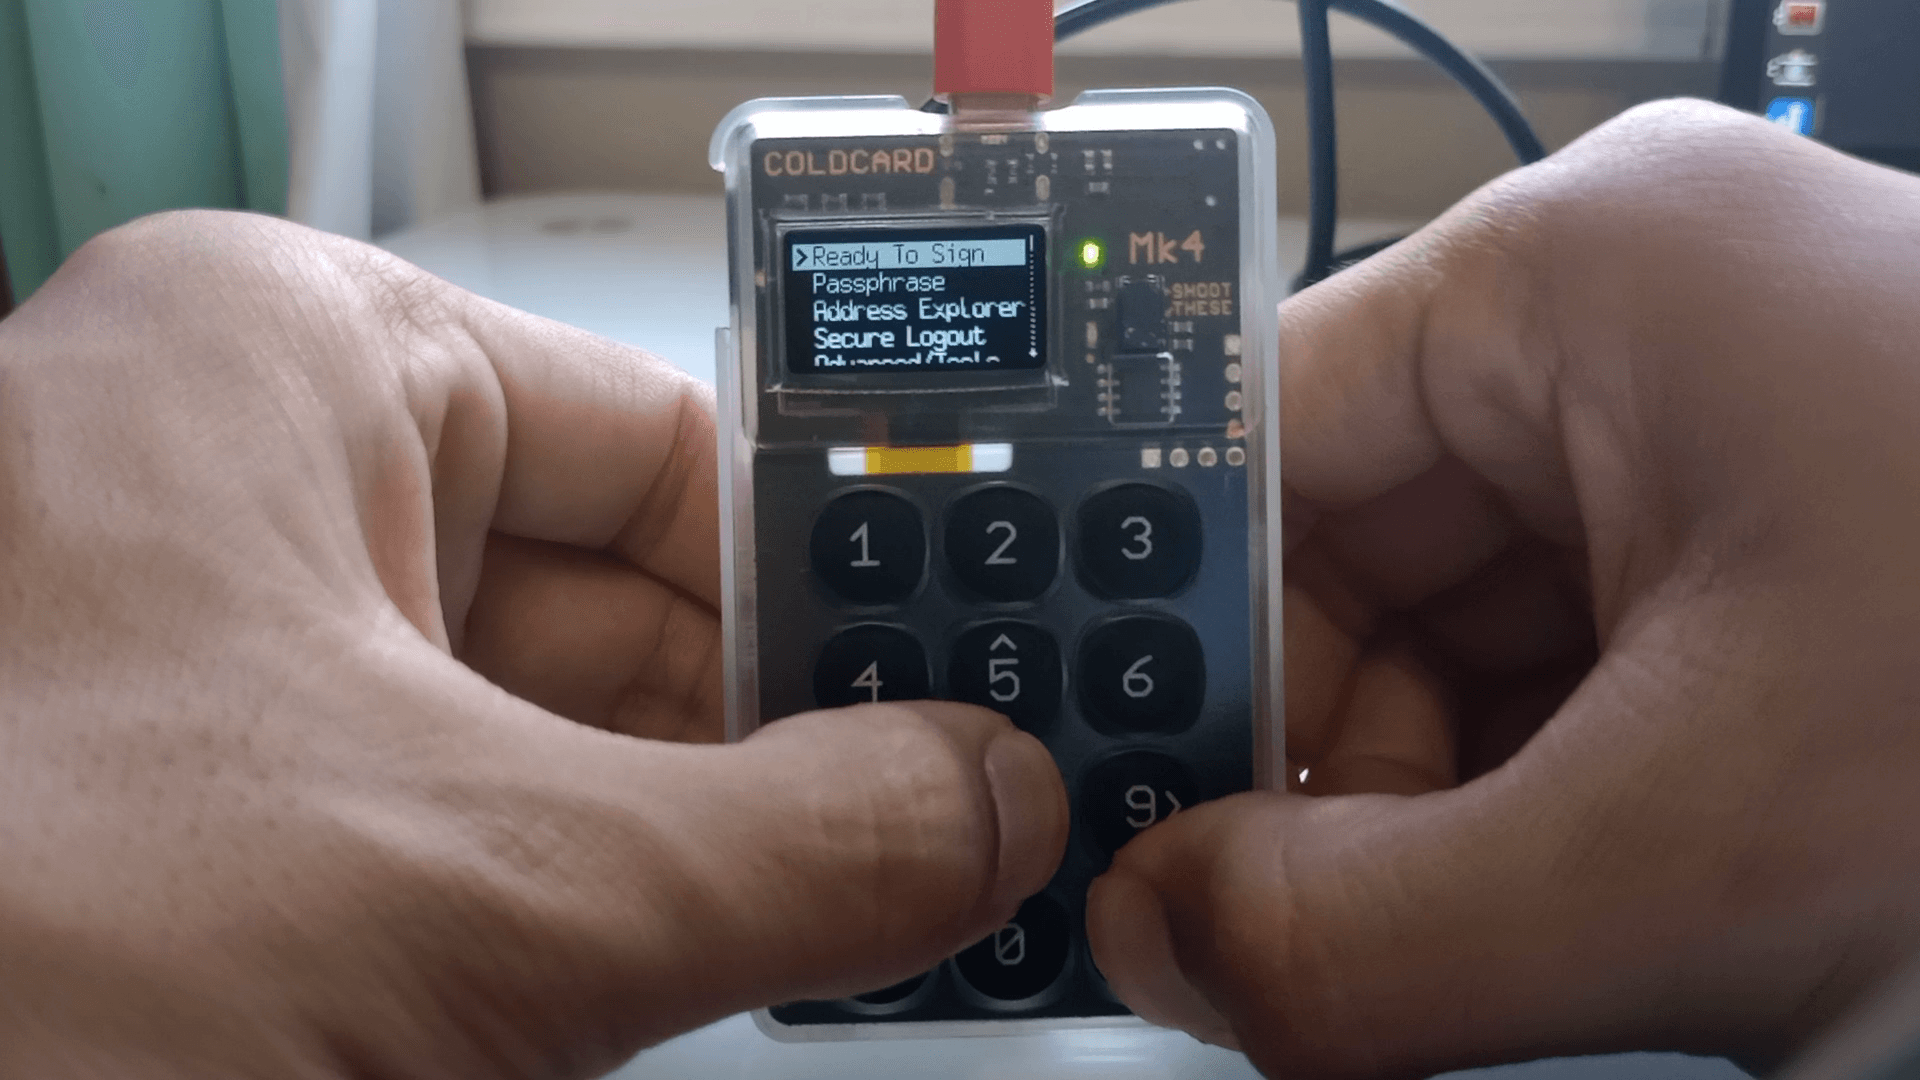
Put the micro SD card into your Coldcard and unlock your hardware wallet if it's not unlocked already. Go ahead and click "Ready to Sign" in the main menu on your Coldcard, and follow the prompts on the device to confirm your operation.
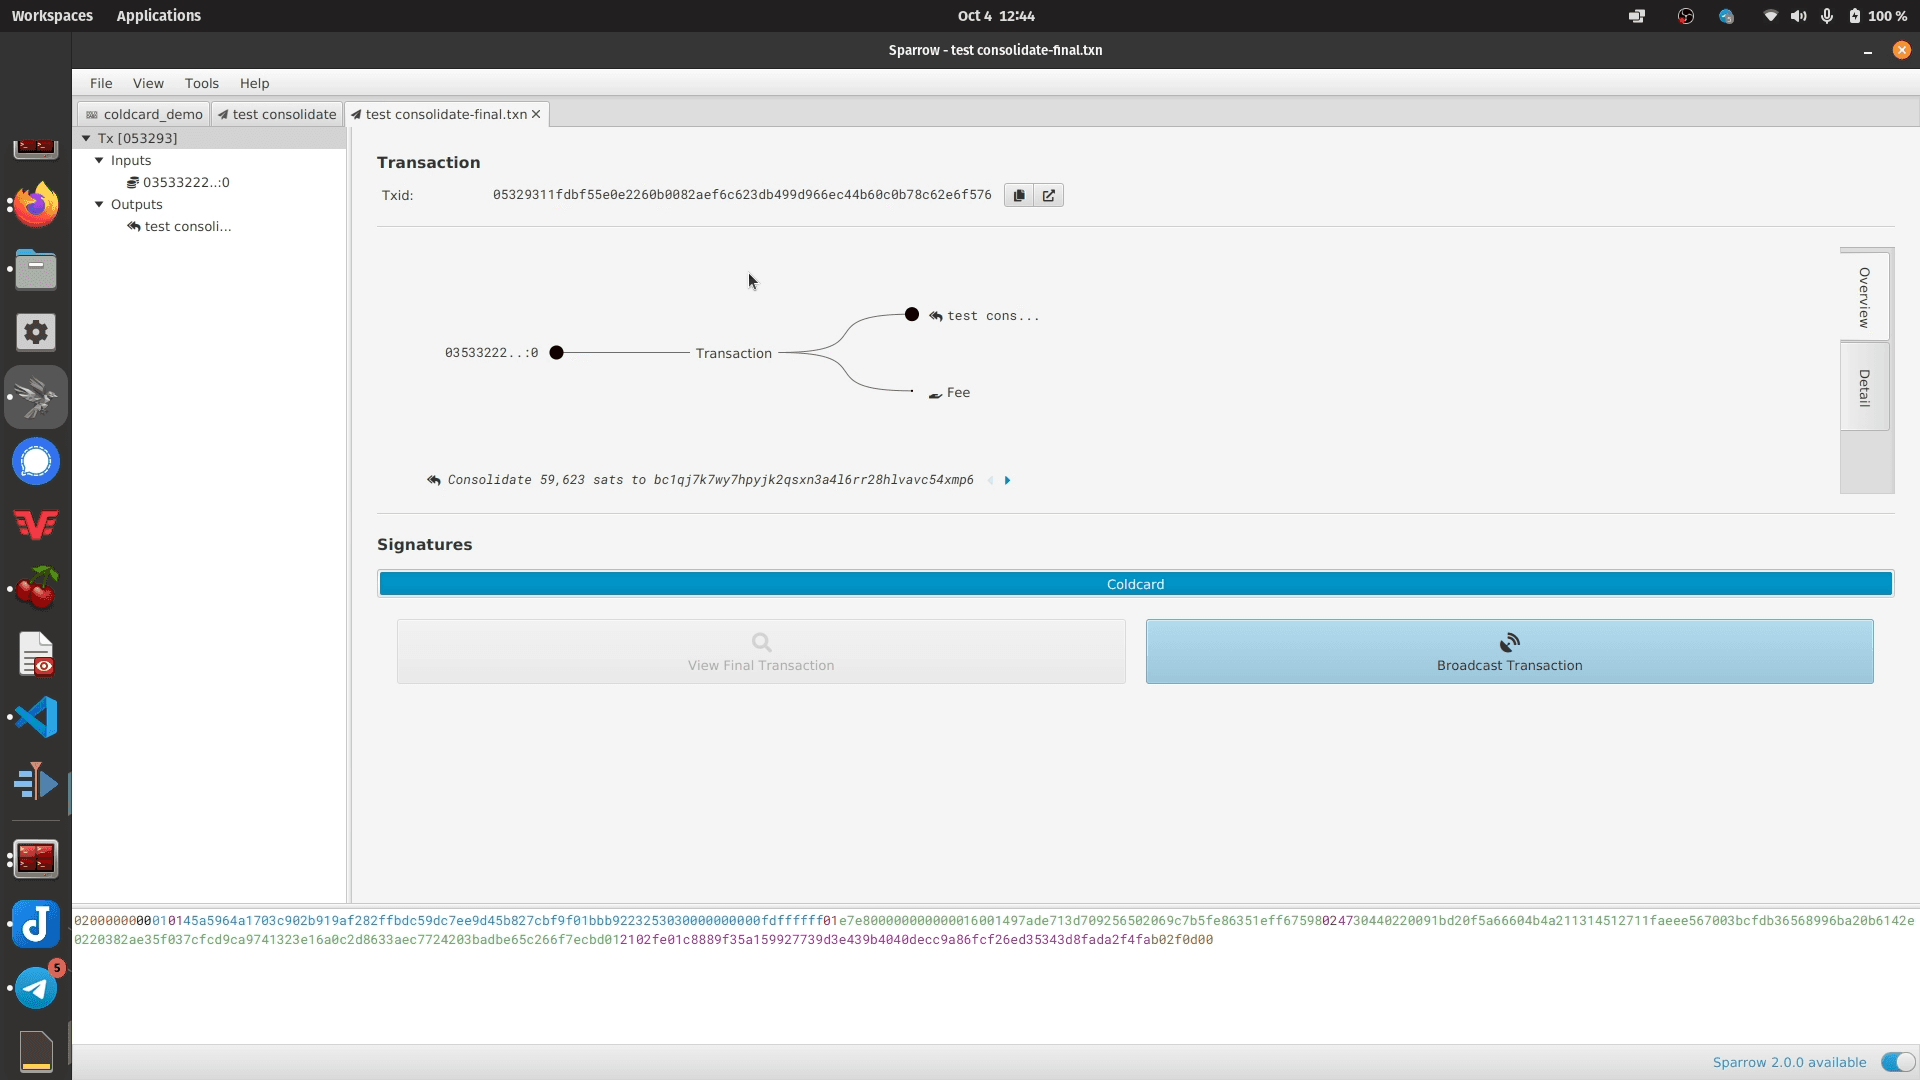
Your signed transaction should be saved to you micro-SD at this point. Put the SD card back into you computer, and load the signed transaction back into Sparrow.
The transaction you want to load ends in the ".txn" file extension.

After your transaction is loaded, go ahead and press "Broadcast Transaction" to send your transaction to the bitcoin network.
And that's all there is to it! Thanks for reading. If you enjoyed this and found value in this content, please consider supporting me by checking out my YouTube channel or by simply using one of my amazon affiliate links for your next amazon purchase.
Never stop stacking!