Create your first bitcoin wallet with Sparrow

Bitcoin can be intimidating. In this guide, I'll walk you through installing and using Sparrow Wallet, a free and open-source Bitcoin wallet. By the end, you'll realize that Bitcoin isn't so scary, and you'll be able to:
- create bitcoin wallets
- send and receive bitcoin
- backup and restore your wallet
This guide is designed for beginners and will focus only on the essential topics needed to accomplish these tasks and understand them conceptually.
What is Sparrow Wallet?
Sparrow Wallet is a modern bitcoin wallet for desktop. It is non-custodial, meaning you are in control of your funds, and it is open-source, meaning anyone can view the code and verify it. Even if you don't know how to read code, hundreds of developers are looking at it every day, searching for bugs and vulnerabilities. You can check out the Sparrow Wallet GitHub page to see the code for yourself.
Sparrow Wallet is a great choice for beginners and advanced users alike. Along with all the usual things you'd expect from a bitcoin wallet, Sparrow Wallet has some advanced features too that you can easily grow into. For the record, Sparrow is my go-to wallet for managing bitcoin.
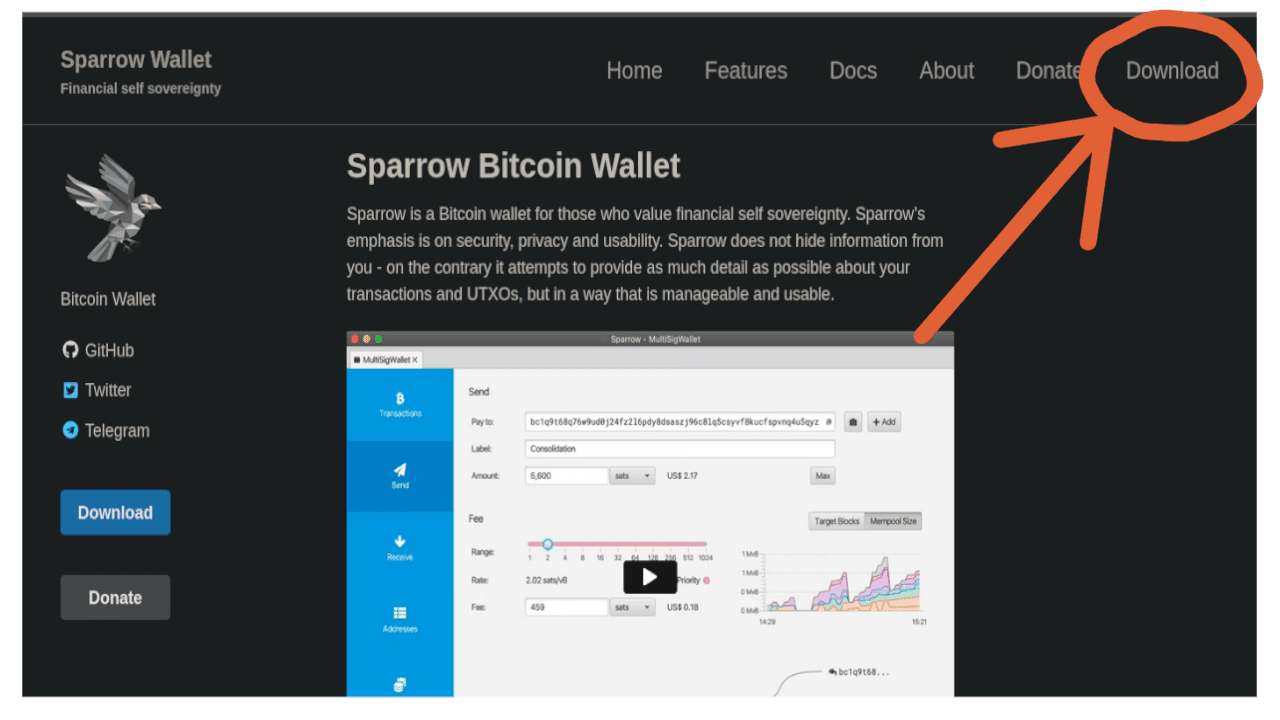
How to download Sparrow Wallet
Navigate to Sparrow's official website, and press the download button in the top right corner.
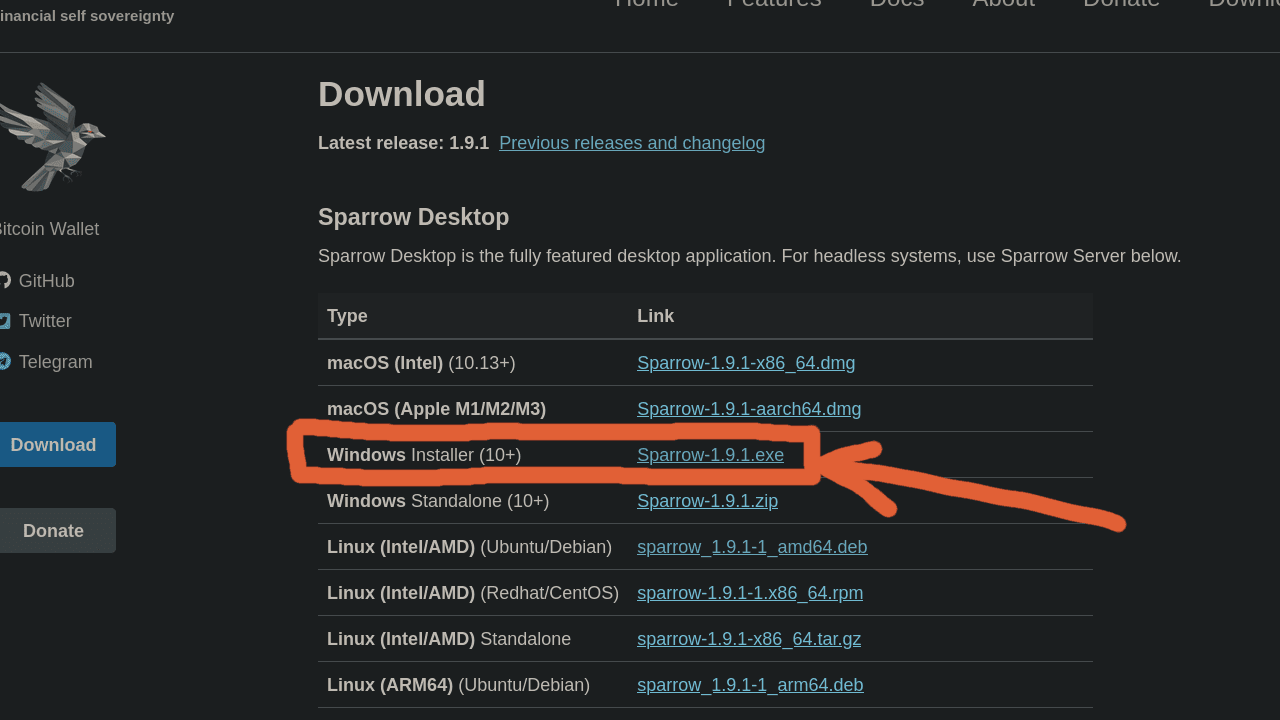
Next, you need to find the download file that is right for your computer. Follow the instructions below based on if you're using a Mac or Windows.
Windows
Download the Windows Installer executable file.
After downloading, find the file in your downloads folder and double click it to begin the installation process. Follow the prompts to install Sparrow Wallet on your computer. Optionally, you can verify the download (slightly more advanced, scroll to verifying section for instructions).
Mac
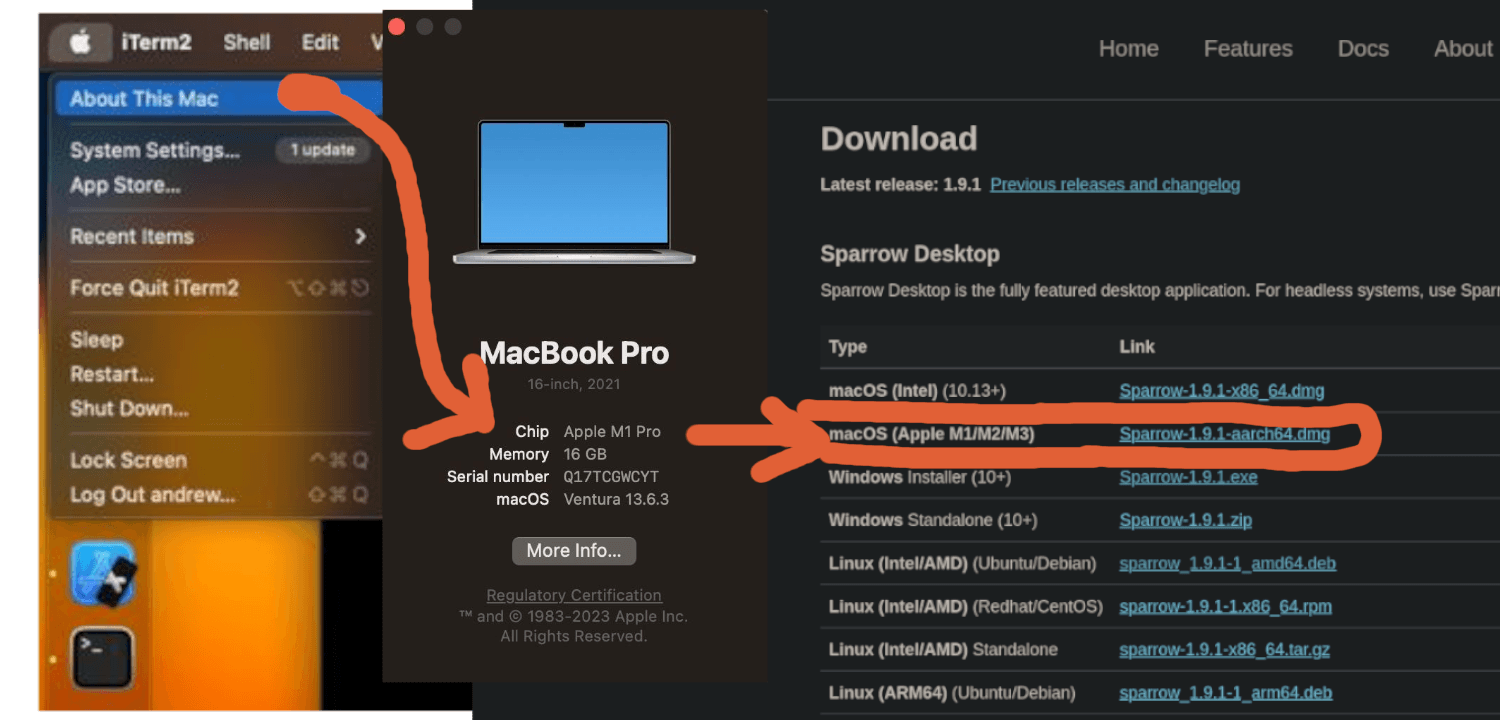
To determine if your Mac needs the "Apple" version or the "Intel" version of Sparrow:
- Click the apple logo in the top left corner of your screen, and select "About This Mac"
- In the pop-up window, look for "Processor" or "Chip"
- If you see "Apple", download the "Apple" version. If you see "Intel", download the "Intel" version. In my case, I would download the "Apple" version
After downloading, find the file in your downloads folder and double click it to begin the installation process. Follow the prompts to install Sparrow Wallet on your computer. Optionally, you can verify the download (slightly more advanced, scroll to verifying section for instructions).
Starting Sparrow Wallet For The First Time
Open Sparrow wallet and go through all the Welcome to Sparrow prompts:
- Read through these, they don't need to make sense yet, but good to have an idea
- When you get to the last one, click "Later or Offline"
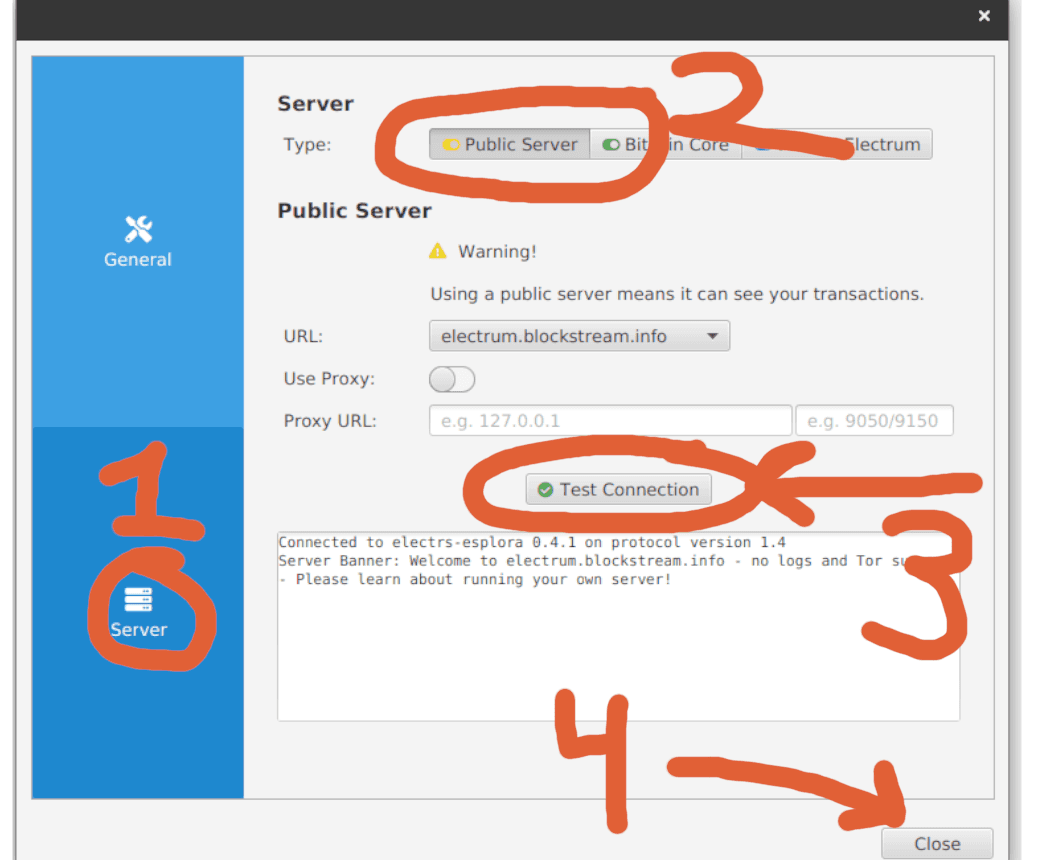
Next, we need to connect to the bitcoin network. To do this, we connect to a bitcoin node. This node is where we get our data about the blockchain from, and it is also how we broadcast transactions. In another guide, I will show you how to run your own node. For now, we will connect to a public node:
- In the top left corner of your screen, go to File > Preferences > Server
- Make sure the "Type" is set to "Public Server"
- Click "Test Connection". If connection is unsuccesful, select another URL from the dropdown menu and try again
- When you get connected, go ahead and close the preferences window
You should now see the toggle on the bottom right corner of your screen is now a yellow color. This means you are connected to the bitcoin network.
How To Create A Wallet
From the main screen:
- Click File > New Wallet
- Insert a name for the wallet
- Click "Create Wallet". This will take you to the next screen shown below
- Click "New or Imported Software Wallet"

You now need to tell Sparrow how you want to create your wallet. See the image below, and the steps underneath it.
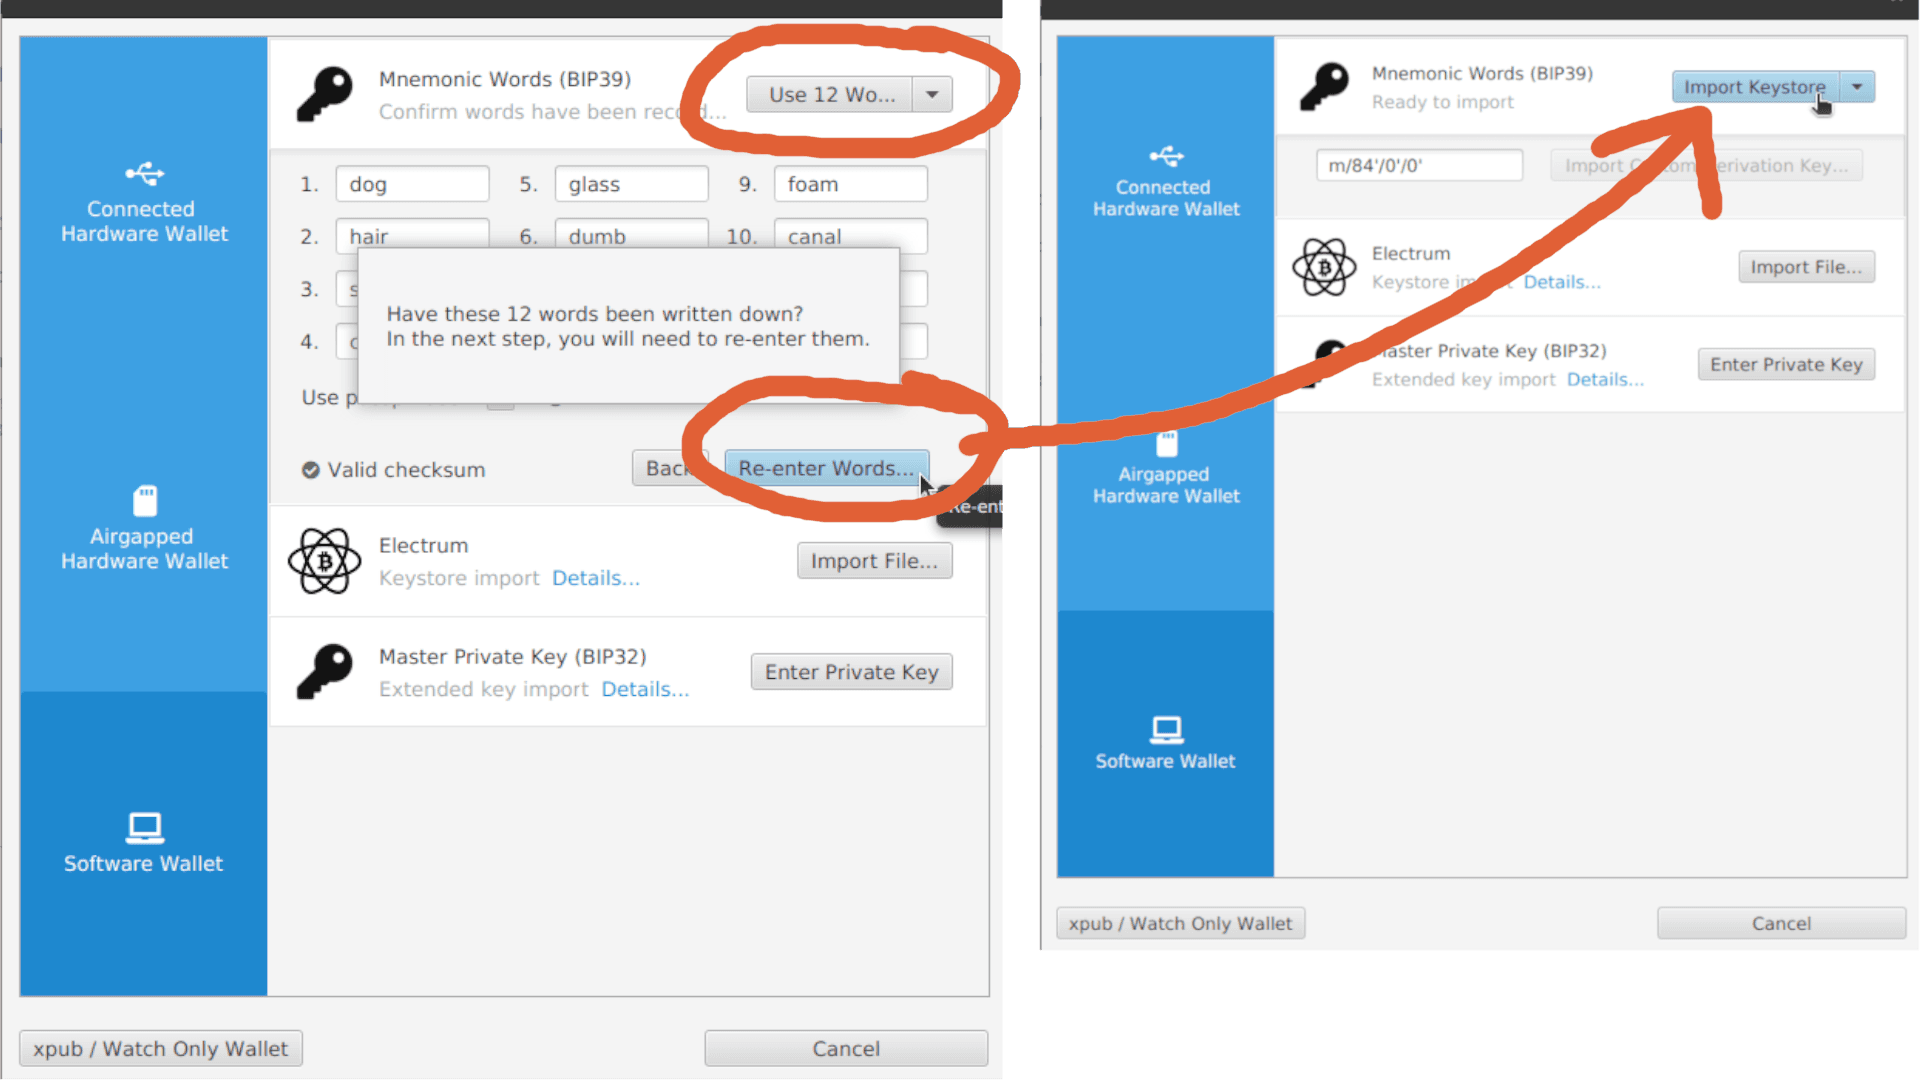
- In Mnemonic Words (BIP39), click the drop down and select "Use 12 Words"
- leave "Use passphrase" unchecked
- Click "Generate New" to generate a new set of 12 words
- Write down these words in order on paper, and keep them safe. This is your backup
- After writing them down, click "Confirm Backup", and "Re-enter Words"
- Complete the small test to make sure you have written down your mnemonic correctly
- Select "Create Keystore", then on the following screen, "Import Keystore". You will then arrive at the wallet screen.
Some important notes about these 12 words. These words are called your "mnemonic" or "seed phrase". They are your wallet. If you lose these words, you lose your wallet. If someone else gets these words, they can take your funds. Keep them safe. Never speak them, or take a picture of them. Congratulations! You have created your first bitcoin wallet, and it's all yours.
Should you ever need to recover your wallet and you only have these 12 words, come back to this screen and instead of generating words, simply insert your own words.
How To Receive Bitcoin
Click the Receive tab from the wallet home screen and you will be greeted with a fresh bitcoin address. This address is all you need to receive bitcoin.
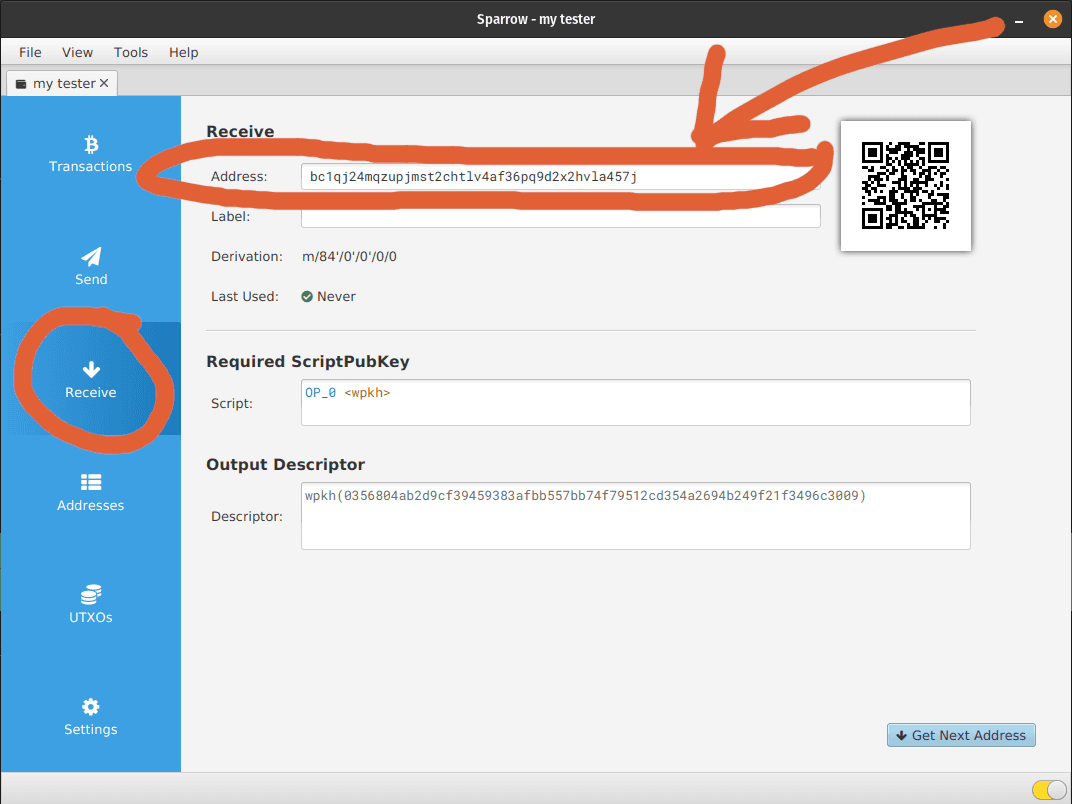
In bitcoin, you have an infinite number of addresses associated with your wallet, so don't be alarmed if you see a new address next time you click the Receive tab.
Let's take this opportunity to briefly explain the Addresses tab and the concept of the UTXO.

UTXO stands for "unspent transaction output" and is like a dollar bill. Let's break it down a bit more.
A 100$ bill in your pocket is an unspent transaction output. Most likely, you made a transaction with your employer, and the result of that transaction was an output of 100$ to you. It's still in your wallet, so it is unspent, hence the unspent transaction output.
When you spend bitcoin, you are spending UTXOs. If you are spending less than the size of the UTXO, you will need to receive change back, much like you get change when you buy a candy bar with a 100$ bill.
In the Addresses tab, the "Receive Addresses" are addresses you receive bitcoin to, and the "Change Addresses" are addresses used internally by your wallet for managing your change when you spend UTXOs (bitcoin). You can see each of your UTXOs in the tab of the same name.
How To Send Bitcoin
Like there are 100 cents in every dollar, there are 100 million satoshis ("sats" for short) in every bitcoin.
Let's send the rest of my sats to bc1qt9tyeaukgf276zd24n5feq93dx7nvc9rqx3033.
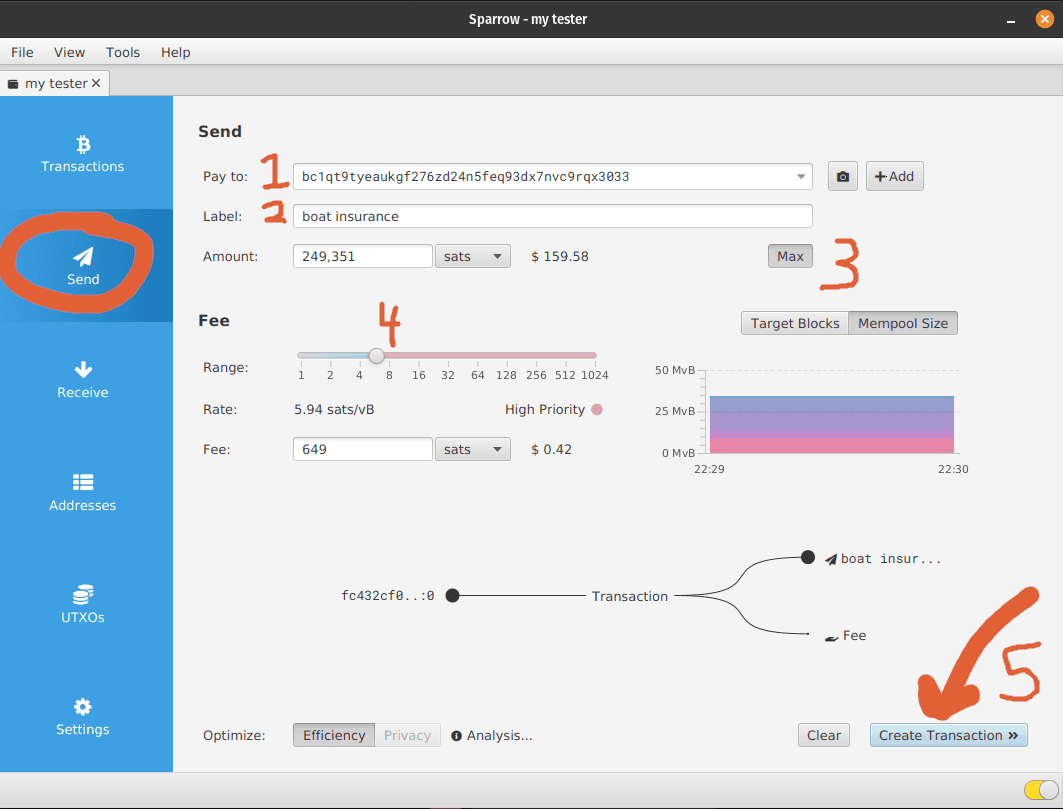
On the Send tab:
- Insert the destination address in "Pay to" field
- Insert a label for future reference
- I want to send all my bitcoin, so I click the "Max" button
- Set the fee to pay for the transaction. Check competitive fees at mempool.space
- Create the transaction
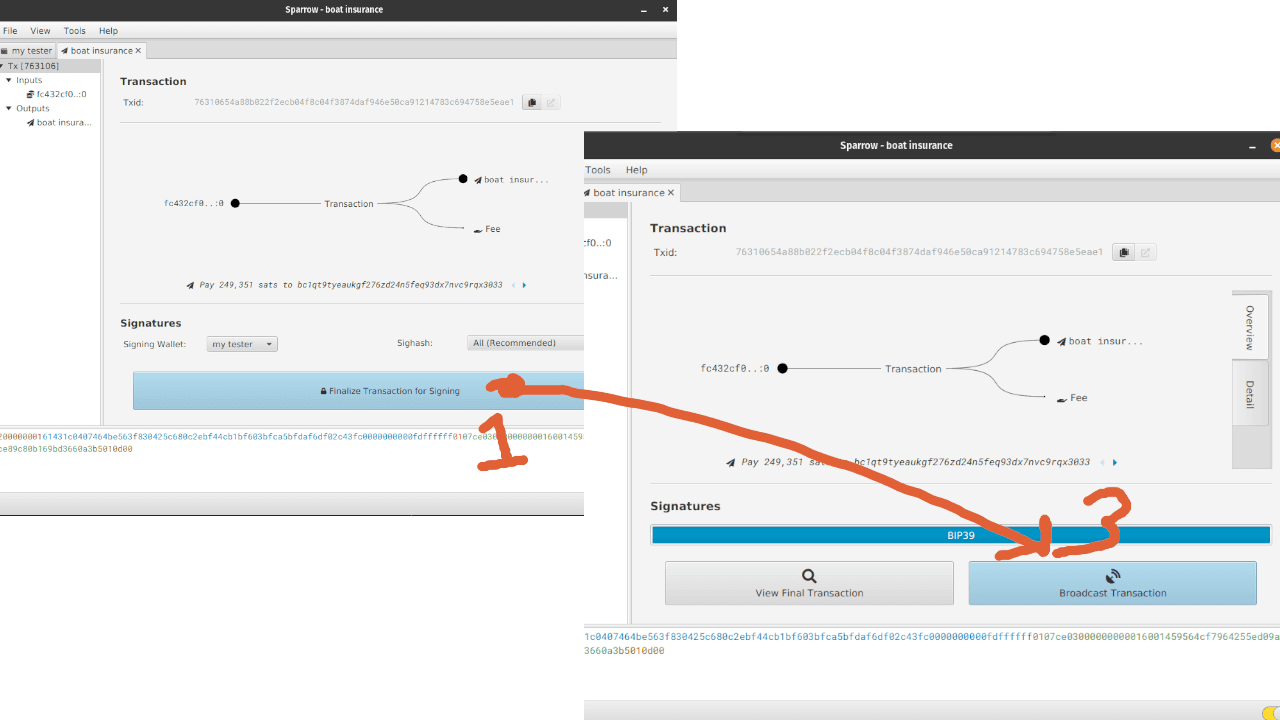
Inspect the flow chart and make sure it makes sense. On either side of the Transaction in the flow chart are UTXOs. If all looks good, then:
- Finalize Transaction for Signing
- Sign the Transaction
- Broadcast the Transaction
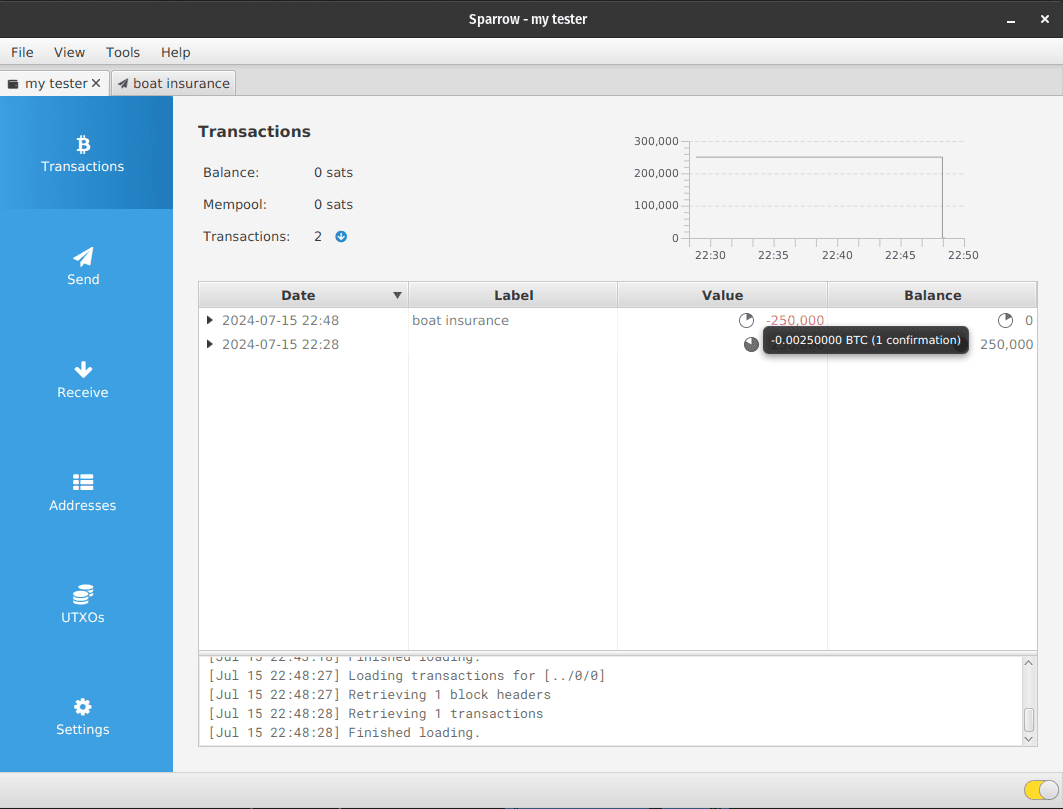
You just broadcasted a transaction! It will say the transaction is "Unconfirmed". This is normal, and your transaction is waiting for a miner to include it into the blockchain. Once you get into a block, your transaction is confirmed. After it is 6 blocks deep, that is said to "have 6 confirmations" and is the gold standard. 6 confirmations essentially means that this transaction is irreversible, forever. You can see your activity in the Transactions Tab. If you hover the little circle/pie looking thing, it will tell you how many confirmations you have.
Closing Thoughts
Congrats! You now know how to use Sparrow wallet for all your bitcoin needs! Of course this didn't touch on everything, but now you have the tools you need to self custody bitcoin at no cost.